How to Vermicompost on a Balcony | 8 Steps
March, 2024 |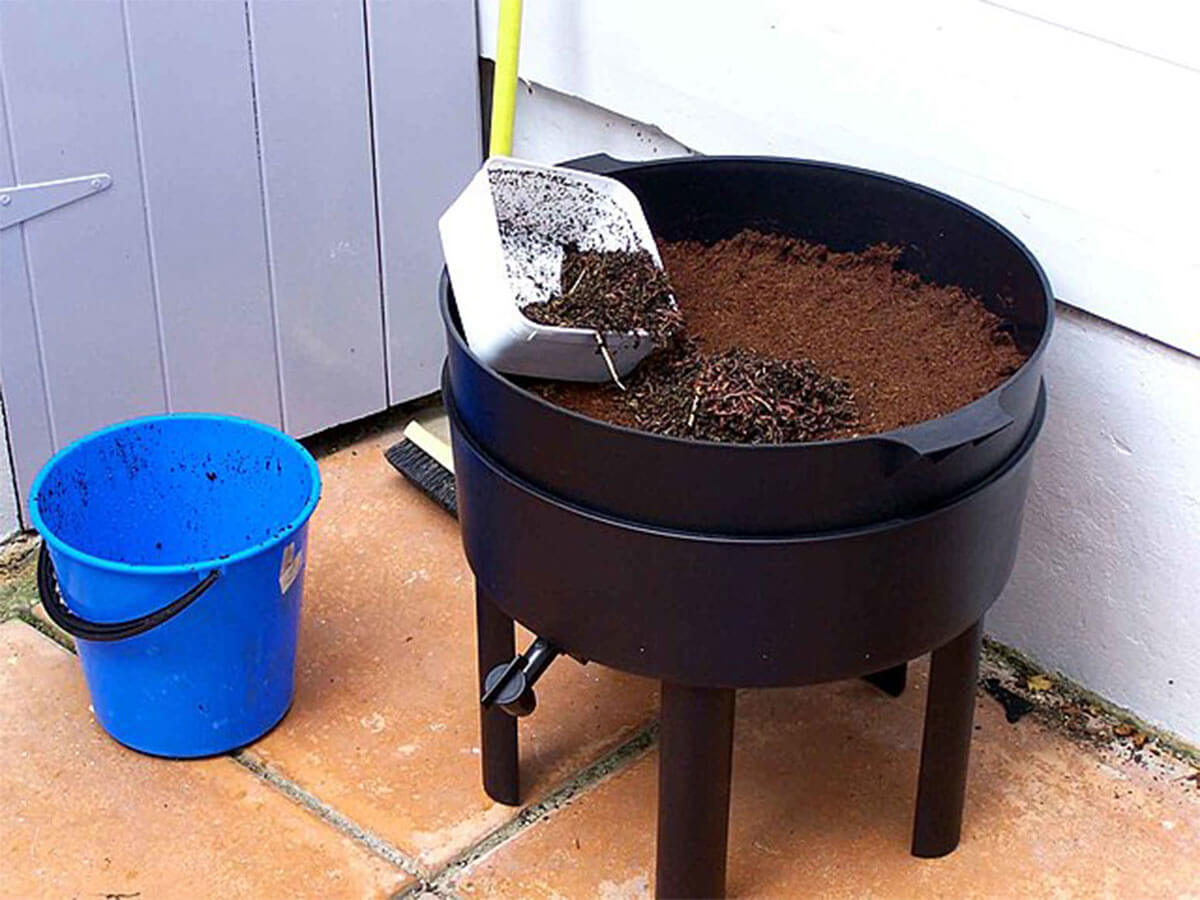
Worm castings are often referred to as one of the best organic fertilizers money can buy. So it’s no wonder that so many of us are interested in making our own.
While it is possible to buy worm castings, for serious growers, having your own regular supply is useful. Plus, a vermicomposting system is a sustainable way to recycle your kitchen waste.
Vermicomposting vs hot composting
On a balcony, where space is often limited, choosing the best composting method for your small garden is the best way to make the most of your space.
Hot composting on a balcony is another efficient composting option for small gardens. This tumbling composter from Amazon helps to boost the contact the composting material has with the bacteria. This extra microbial activity boosts the temperature, providing the best environment for the microbes and ultimately helping your kitchen waste break down quicker!


The benefits of vermicomposting
The main benefits of vermicomposting are that it produces an extremely nutritious and aerated compost in a relatively short space of time and with minimal space. This is ideal for those of us with small gardens!
How to vermicompost on a balcony | 8 steps
So if you’re looking to create a vermicomposting set-up on your balcony, our step-by-step guide walks you through each stage.
From choosing the best vermicompost bin for your space to a step-by-step guide to how it all works, and how to collect that nutritious, crumbly, black gold…
1. Choosing a vermicomposter for your balcony
You can buy a ready-made vermicompost bin from plenty of great suppliers. There are lots of great brands out there, including this vermicomposting bin and accessory kit from Amazon. It comes with a starter pack that has all you need to set things up.
If you’re on a tight budget, you could even try creating your own DIY vermicompost setup. Just note that specially-made vermicomposters usually have useful tray systems that make collecting worm castings a lot easier. With worm castings in the lower tray and worms and decomposing waste and bedding in the higher trays.
They’ll also have a spigot that will allow excess moisture to drain. This excess moisture also happens to be a very nutritious ‘worm tea’ that you can use as a liquid fertilizer on plants.

2. Does it matter where you position your vermicomposter?
A vermicompost bin isn’t just an indoor composting method, it works well outside too. As long as you keep an eye on the temperature of your bin…
Vermicomposting worms need an environment of 55F to 85F. So being exposed to scorching sun on a balcony or a sub-zero winter might kill them off.
The best way to position your vermicomposter on your balcony is to place it in a sheltered, shady spot. Then, keep an eye on the temperature with a small thermometer. If things start getting too hot or too cold, you can move your vermicomposter around, or even bring it indoors if needed.
3. Adding bedding
Although it’s called ‘bedding’, worm bedding isn’t exactly a cozy duvet or blanket… Worm bedding is a ‘brown’ material (a bit like that needed for normal compost bins). However, it serves a different function in a vermicomposter.
Some examples of worm bedding…
- Old dry leaves
- Coconut coir
- Wood chips
- Shredded cardboard or paper (non-colored)
- Straw or hay
- Old compost (a great use for old container compost!)
Worm bedding helps to increase aeration, gives the worms something else to feed on, and simply holds moisture that provides the worms with the best conditions to thrive.
You should aim to add about 30% bedding material and 70% food waste.
4. Adding the right ‘waste’
To produce the best possible vermicompost you should only add fruit and vegetable peelings (not onion or citrus peel though), coffee grounds, and tea leaves. Advice varies, but generally, small amounts of cooked food (no meat/fish), pasta, and bread are ok, but really should be kept as minimal as possible.
There are some waste products that you should avoid adding to your composter. These include dairy products, meat/fish, citrus, onions, and any fatty or oily food.
They can begin to smell very quickly and aren’t the preferred diet of vermicomposting worms.

5. Adding worms
The worms used in vermicomposting are known as Red Wigglers (Eisenia fetida). They eat a lot and reproduce quickly, which means faster compost production!
You can buy them from plenty of different places, from specialist online worm shops to fishing stores.
Ideally, to begin with, you need about 1 lb of worms for most average vermicomposters. For larger worm bins, 2-3lbs is often recommended. But if you’re unsure, start small, keep them happy, and they’ll soon multiply.

6. Maintaining the environment
Unlike a tumbling compost bin, a vermicompost bin needs a little extra monitoring. You’ll need to keep an eye on…
- Moisture: it needs to be damp but not wet
- Temperature: worms like it between 55 and 85 degrees Fahrenheit
- Aeration: worms breathe through their skin, so there needs to be an airflow to provide oxygen
- pH: worms like a pH of between 6.0 to 7.0
At first, it may seem like an overwhelming list… but by adding the right bedding and organic waste, and keeping an eye on things, the environment should be optimum for the worms to work their magic.
The reason for not adding citrus peel is because it’s acidic and can influence the pH.
7. How to collect worm castings
After a few months, your vermicomposter will start to fill with worm castings! You’ll know it’s ready to harvest when a layer of dark crumbly soil replaces the kitchen peelings and bedding that you’ve been adding.
There are a few different methods for collecting. But if your balcony has limited space, the best methods would be the relocation or light collection methods.
You could easily collect worm castings out by hand (if you’re not too squeamish). But to make it easier you may need:
- A mesh screen to filter out the worms and larger pieces of undigested food scraps
- A scoop to collect the worm castings
- A small hand rake or trowel
- A bucket to add your worm castings into
The relocation method…
A week or two before you plan to collect your worm castings, tempt the worms into one specific area by burying organic waste and new bedding onto one side or one corner of your vermicomposter. Most worms will then migrate to that area, allowing you to scoop out worm-free worm castings in the other area.
The light method…
Red wigglers like to live a couple of inches under the surface of the soil, away from the light. By simply lifting the lid (and even shining a light) you can make the worms burrow deeper into the vermicomposter. This allows you to scoop the first couple of inches of worm castings away without taking too many worms.

8. Using your worm castings!
There really is a reason that worm castings are referred to as black gold. It’s a crumbly mix packed with nutrients and microbes that provide perfect nutrition for plants to grow healthy and strong.
Mix it into compost whenever you’re planting new plants or vegetables. You can even refresh old compost from containers with worm castings too.
You can even use your vermicompost in potted houseplants too to boost the soil nutrition.

Hey there! I'm Hannah from Mini Garden Spaces.
I'm a gardener currently based in Gloucestershire. Balconies, patios or windowsills... no matter how small your garden, you'll find top tips on growing beautiful plants and tasty veg in your mini garden space.
Disclosure
This page may contain affiliate links. In the event of a sale, I will be awarded a small commission (at no extra cost to you).


